
The starting file provided for this challenge was namedDocumentation Index
Fetch the complete documentation index at: https://docs.jaspervanzeir.be/llms.txt
Use this file to discover all available pages before exploring further.
output.bmp, which suggested it was an image. To verify this, I opened my Kali Linux terminal and ran a basic file check.
Enumeration & Initial Triage
I started by running thefile command to see what the system thought of it:
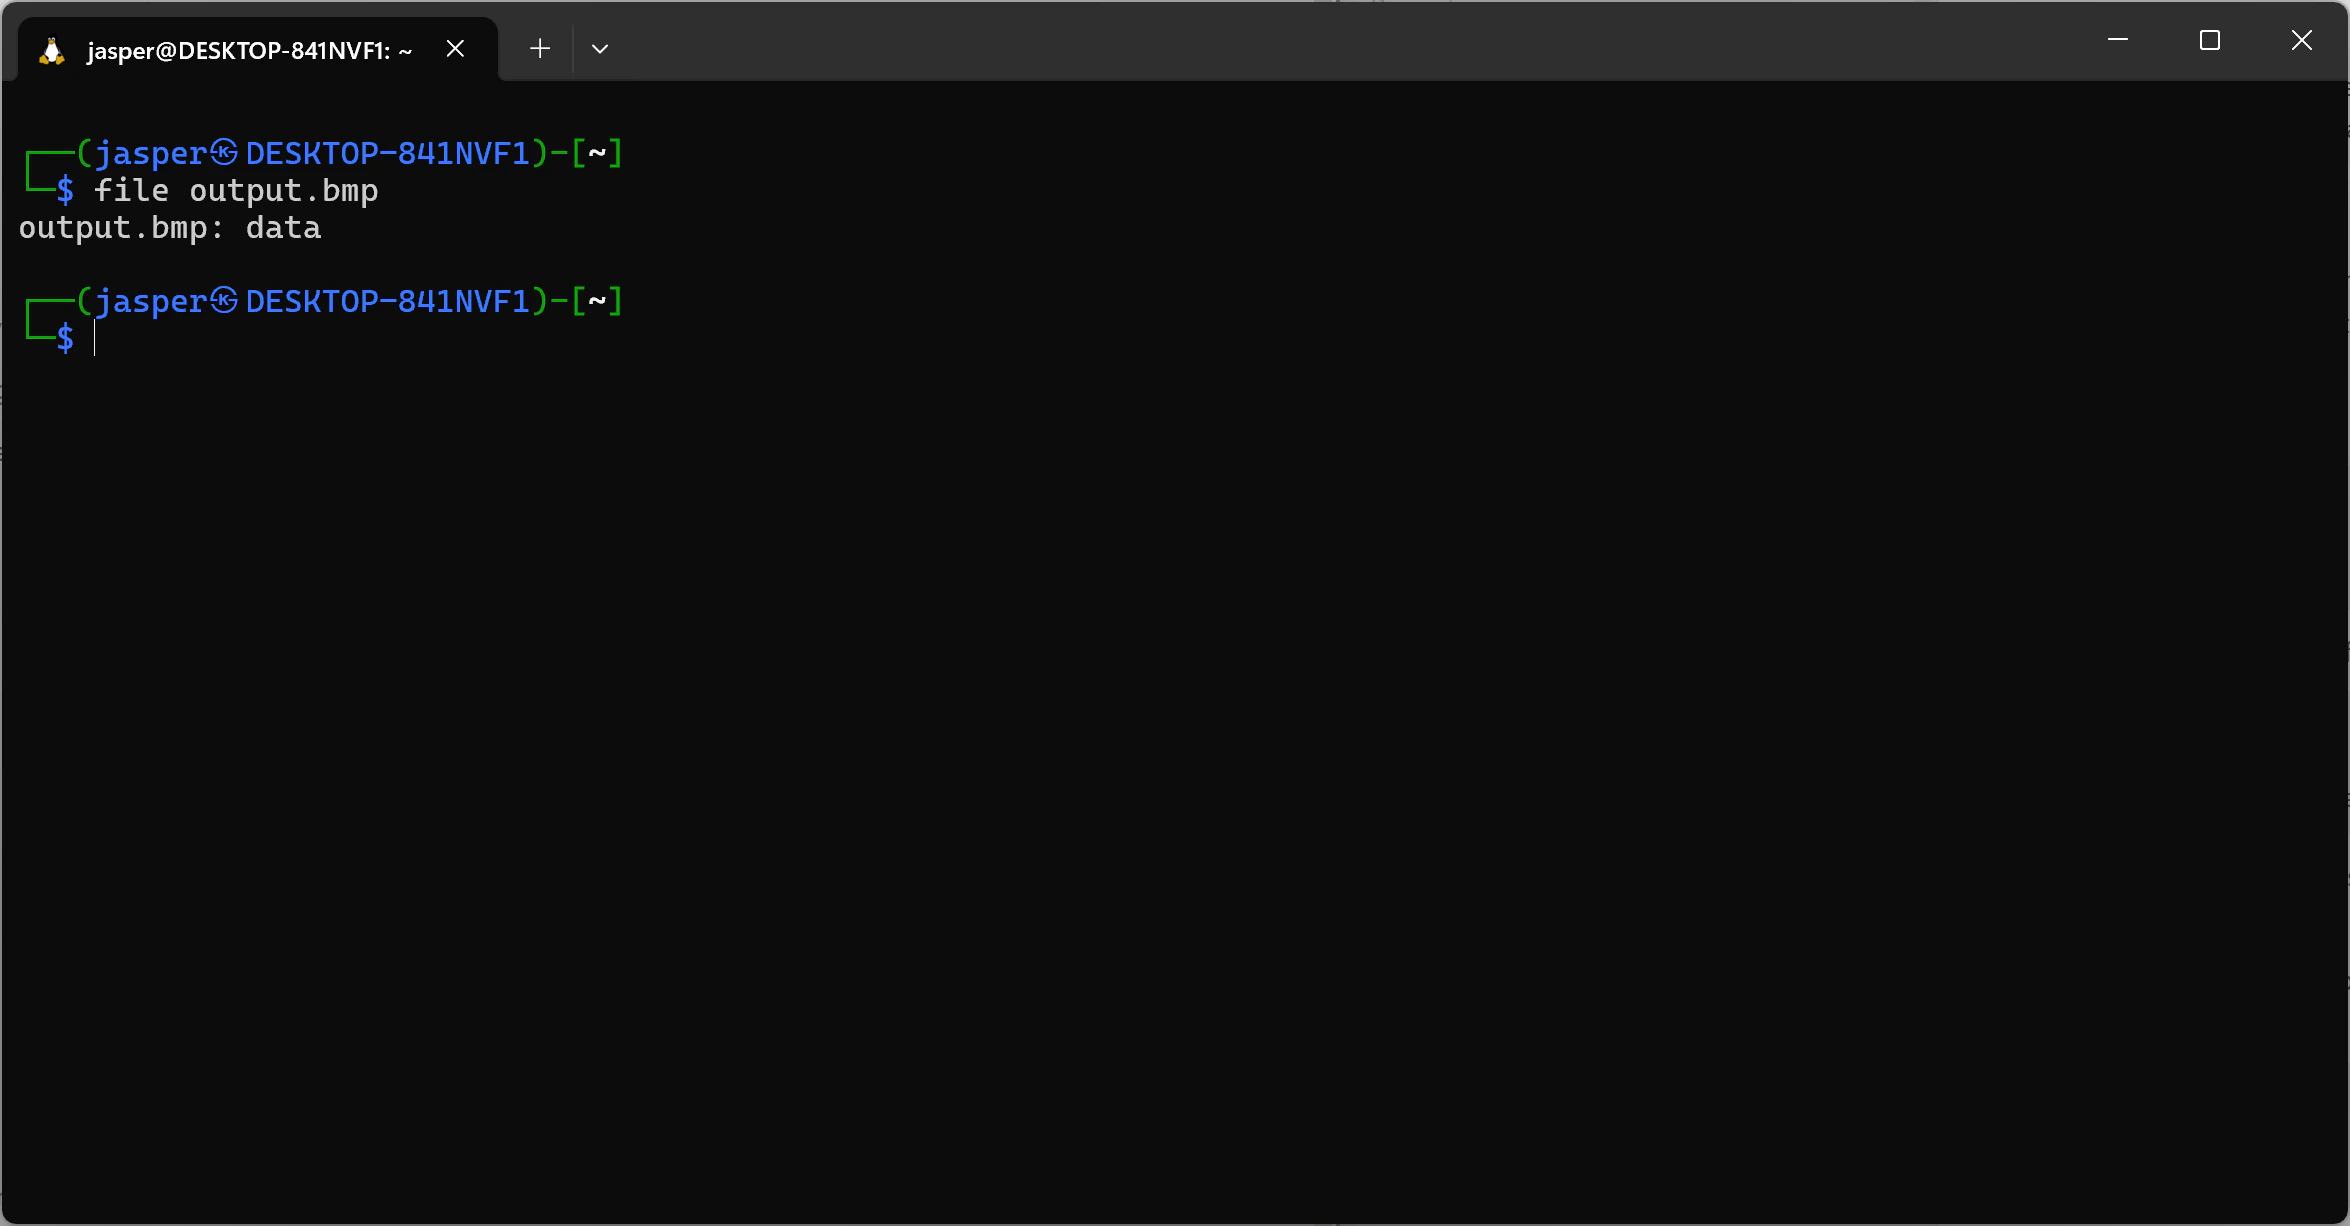
BM. Looking at the hex dump:
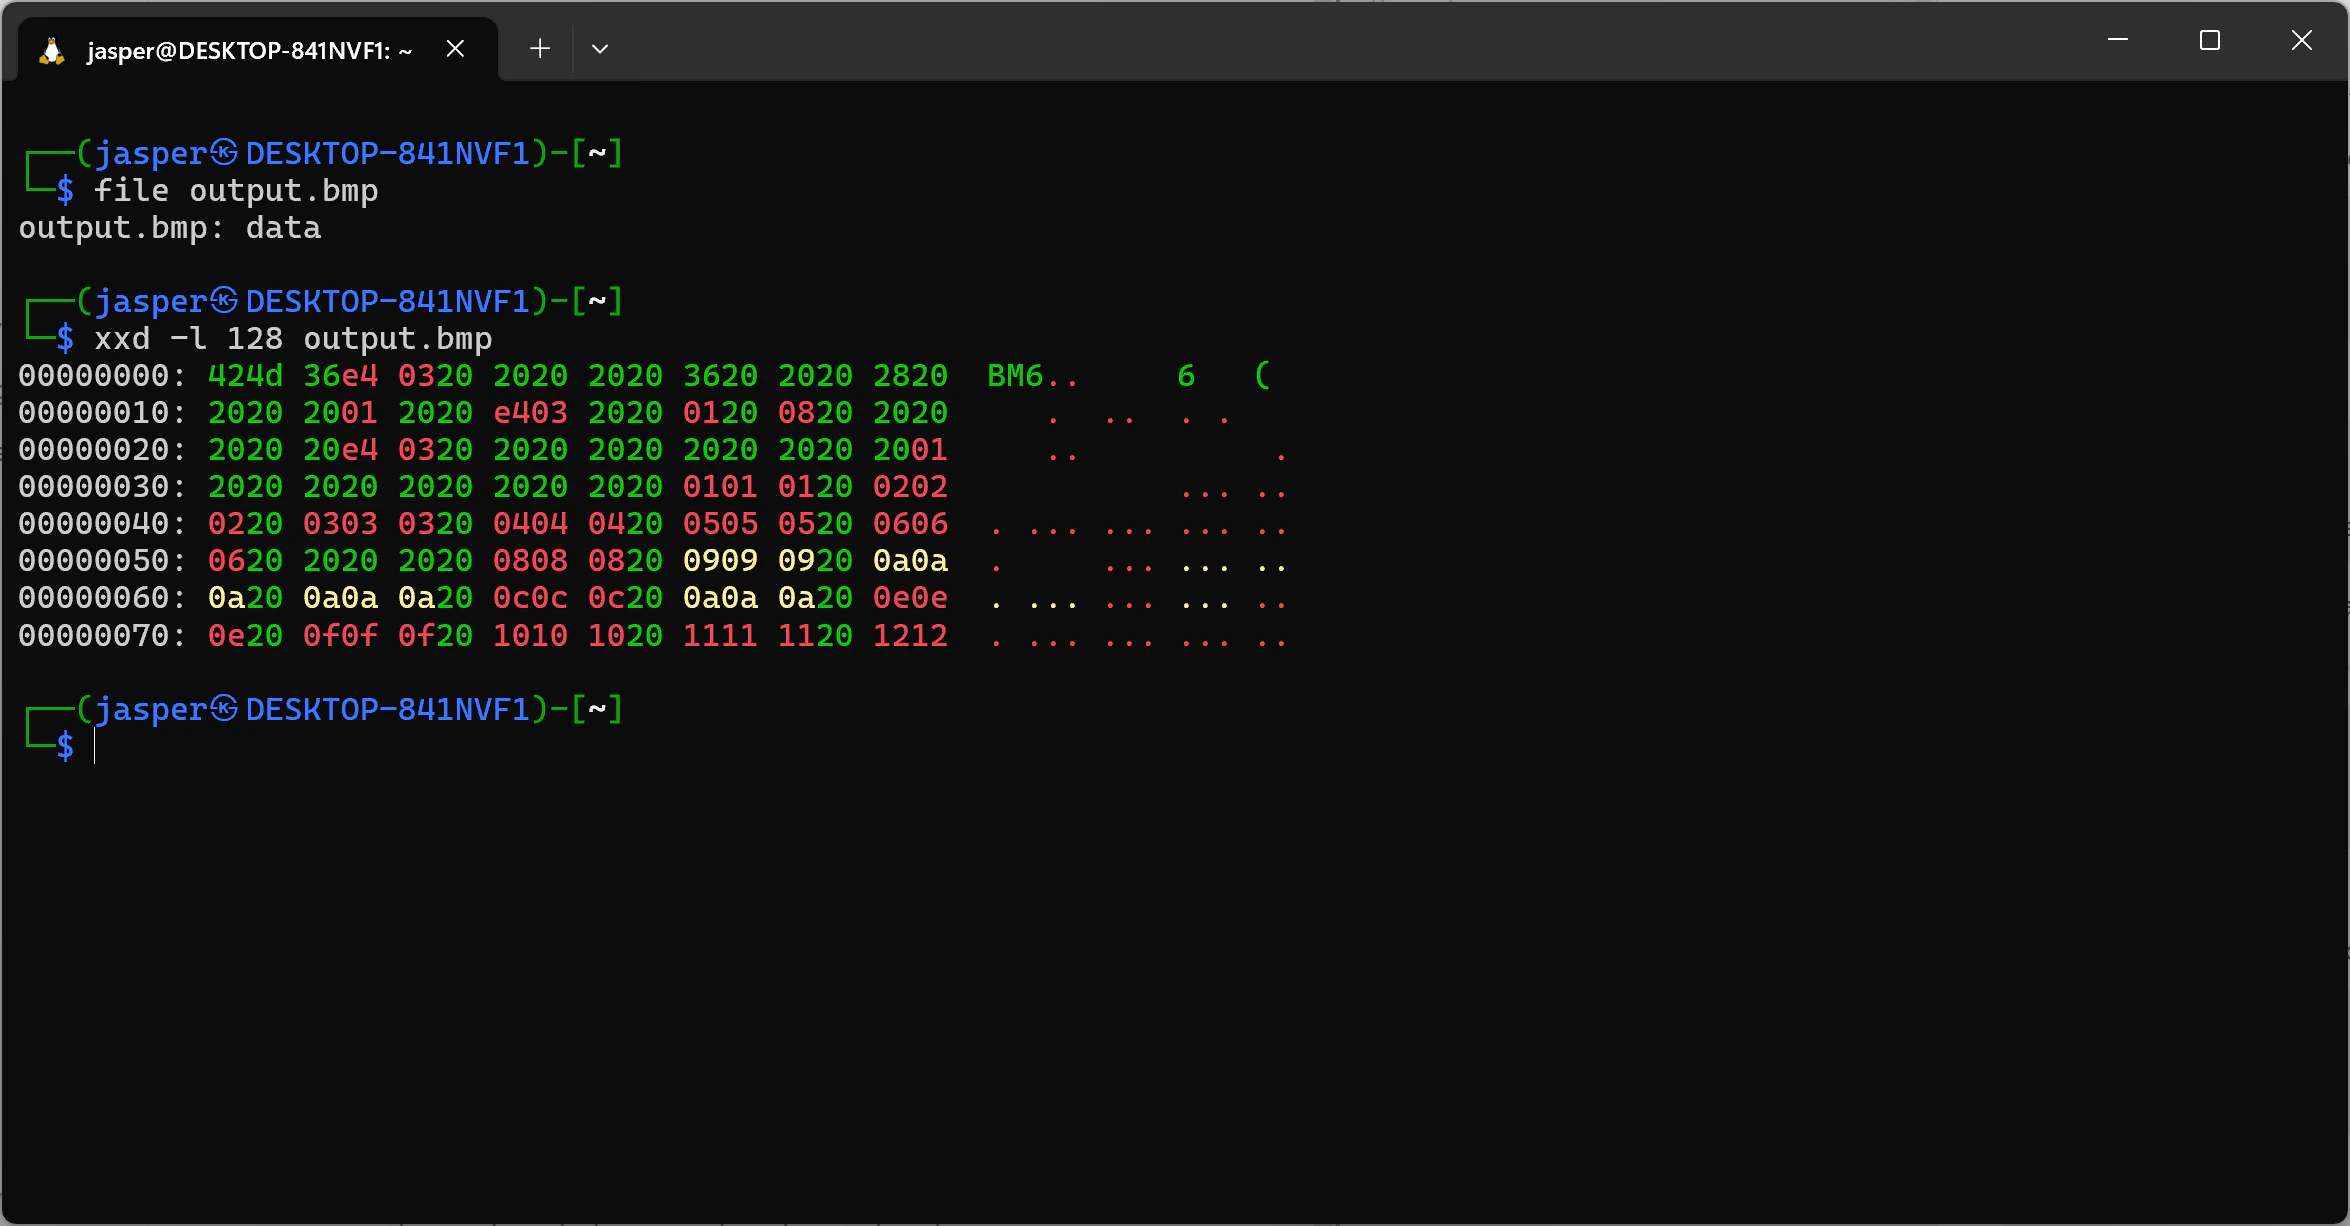
42 4d, which translates to BM. This confirmed the file was actively disguising itself as a BMP. However, something else immediately caught my eye: there was a massive amount of 20 bytes. In hex, 20 represents a space character. Normally, binary headers are padded with null bytes (00), not spaces.
I asked myself:
Why are there so many spaces where empty bytes should be?The logical conclusion was that the file was obfuscated. Hoping to find some readable text or hints about potential malware, I ran the
strings command:
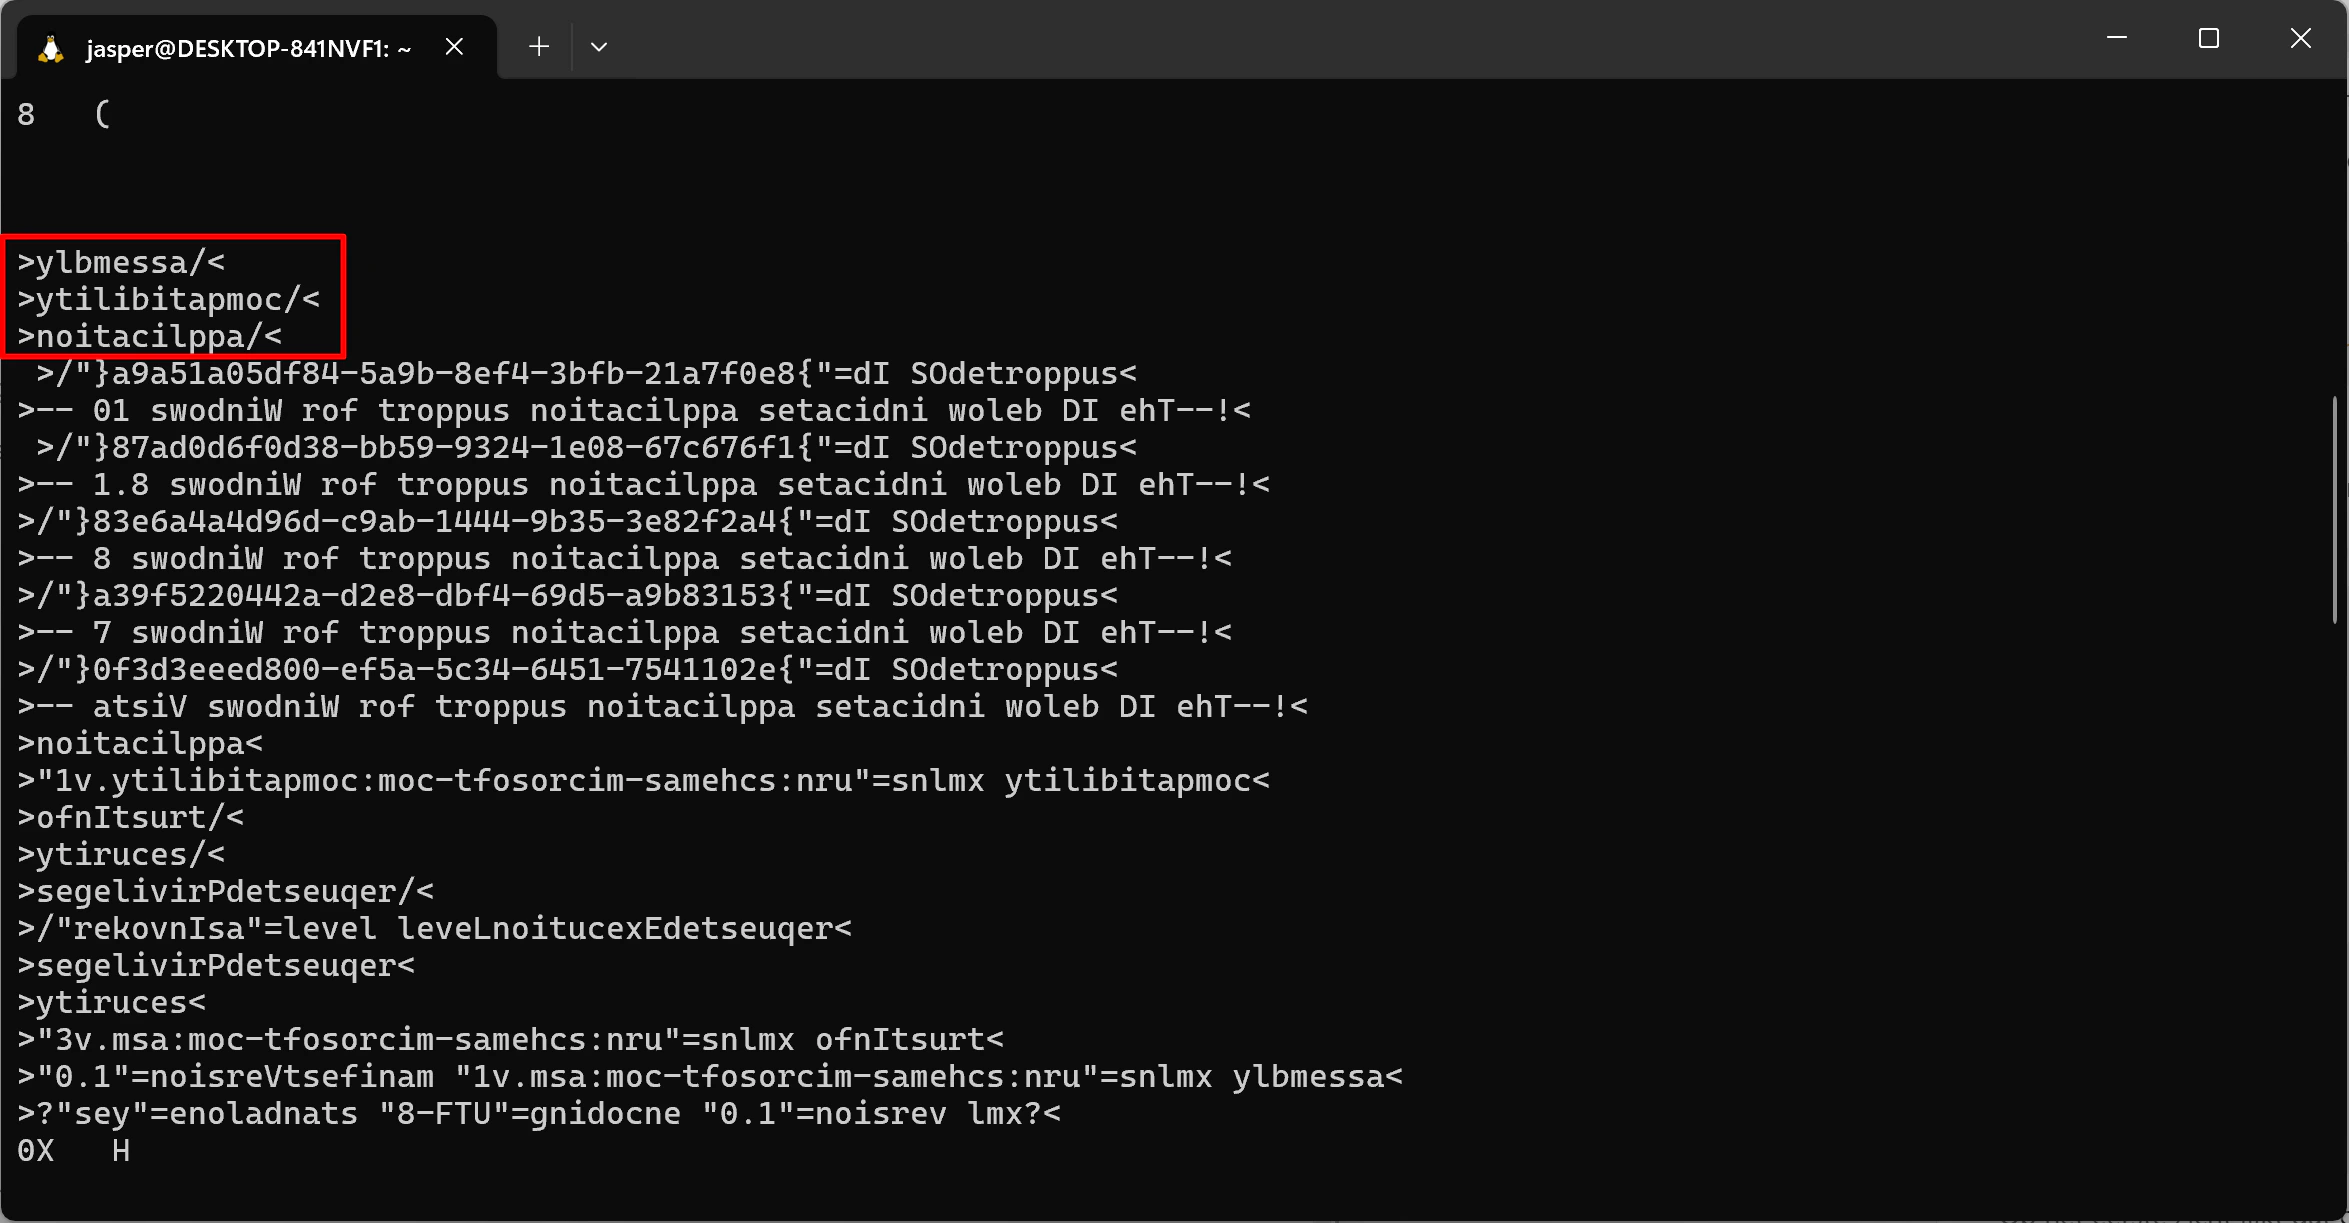
</assembly>, </compatibility>, and </application>. I realized the entire file had been reversed byte-by-byte.
De-obfuscation: Reversing and Patching
To fix this, I needed to reverse all the bytes and save them into a new file. I quickly wrote a Python script directly in the terminal to handle this:.bin file because I wasn’t entirely sure what the new file type would be yet. I inspected the newly created reversed.bin:
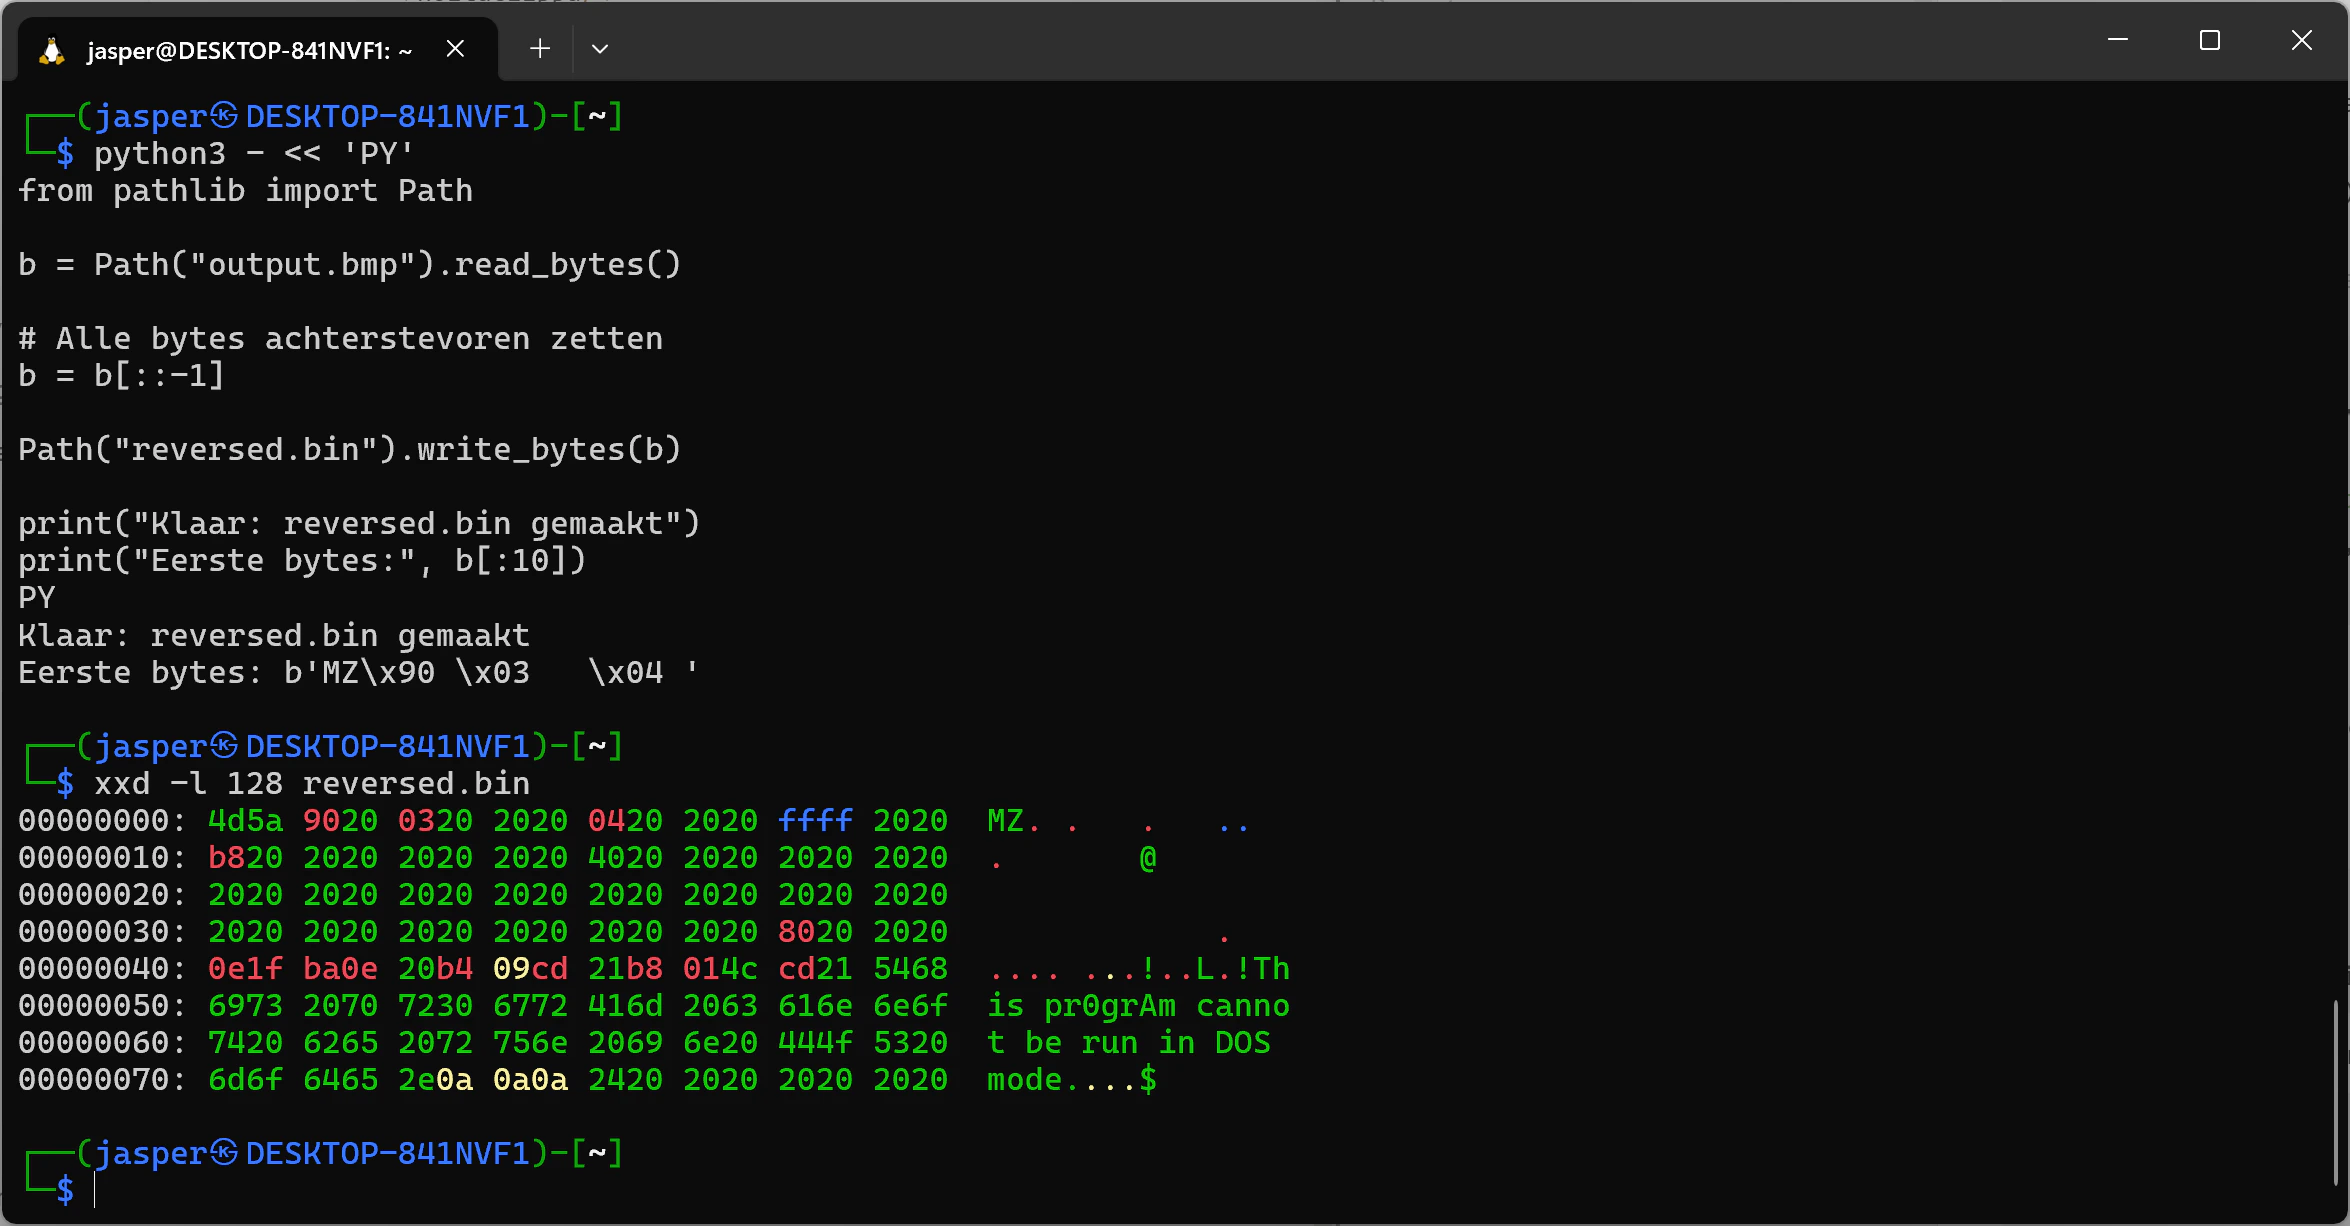
MZ (4d 5a). Based on common file signatures, MZ dictates that this is a DOS/Windows Executable (.exe).
However, I still had the issue of the space characters. Earlier, I noticed that all null bytes (00) had been replaced by spaces (20). I wrote another Python script to patch the reversed file by replacing all 0x20 bytes with 0x00:
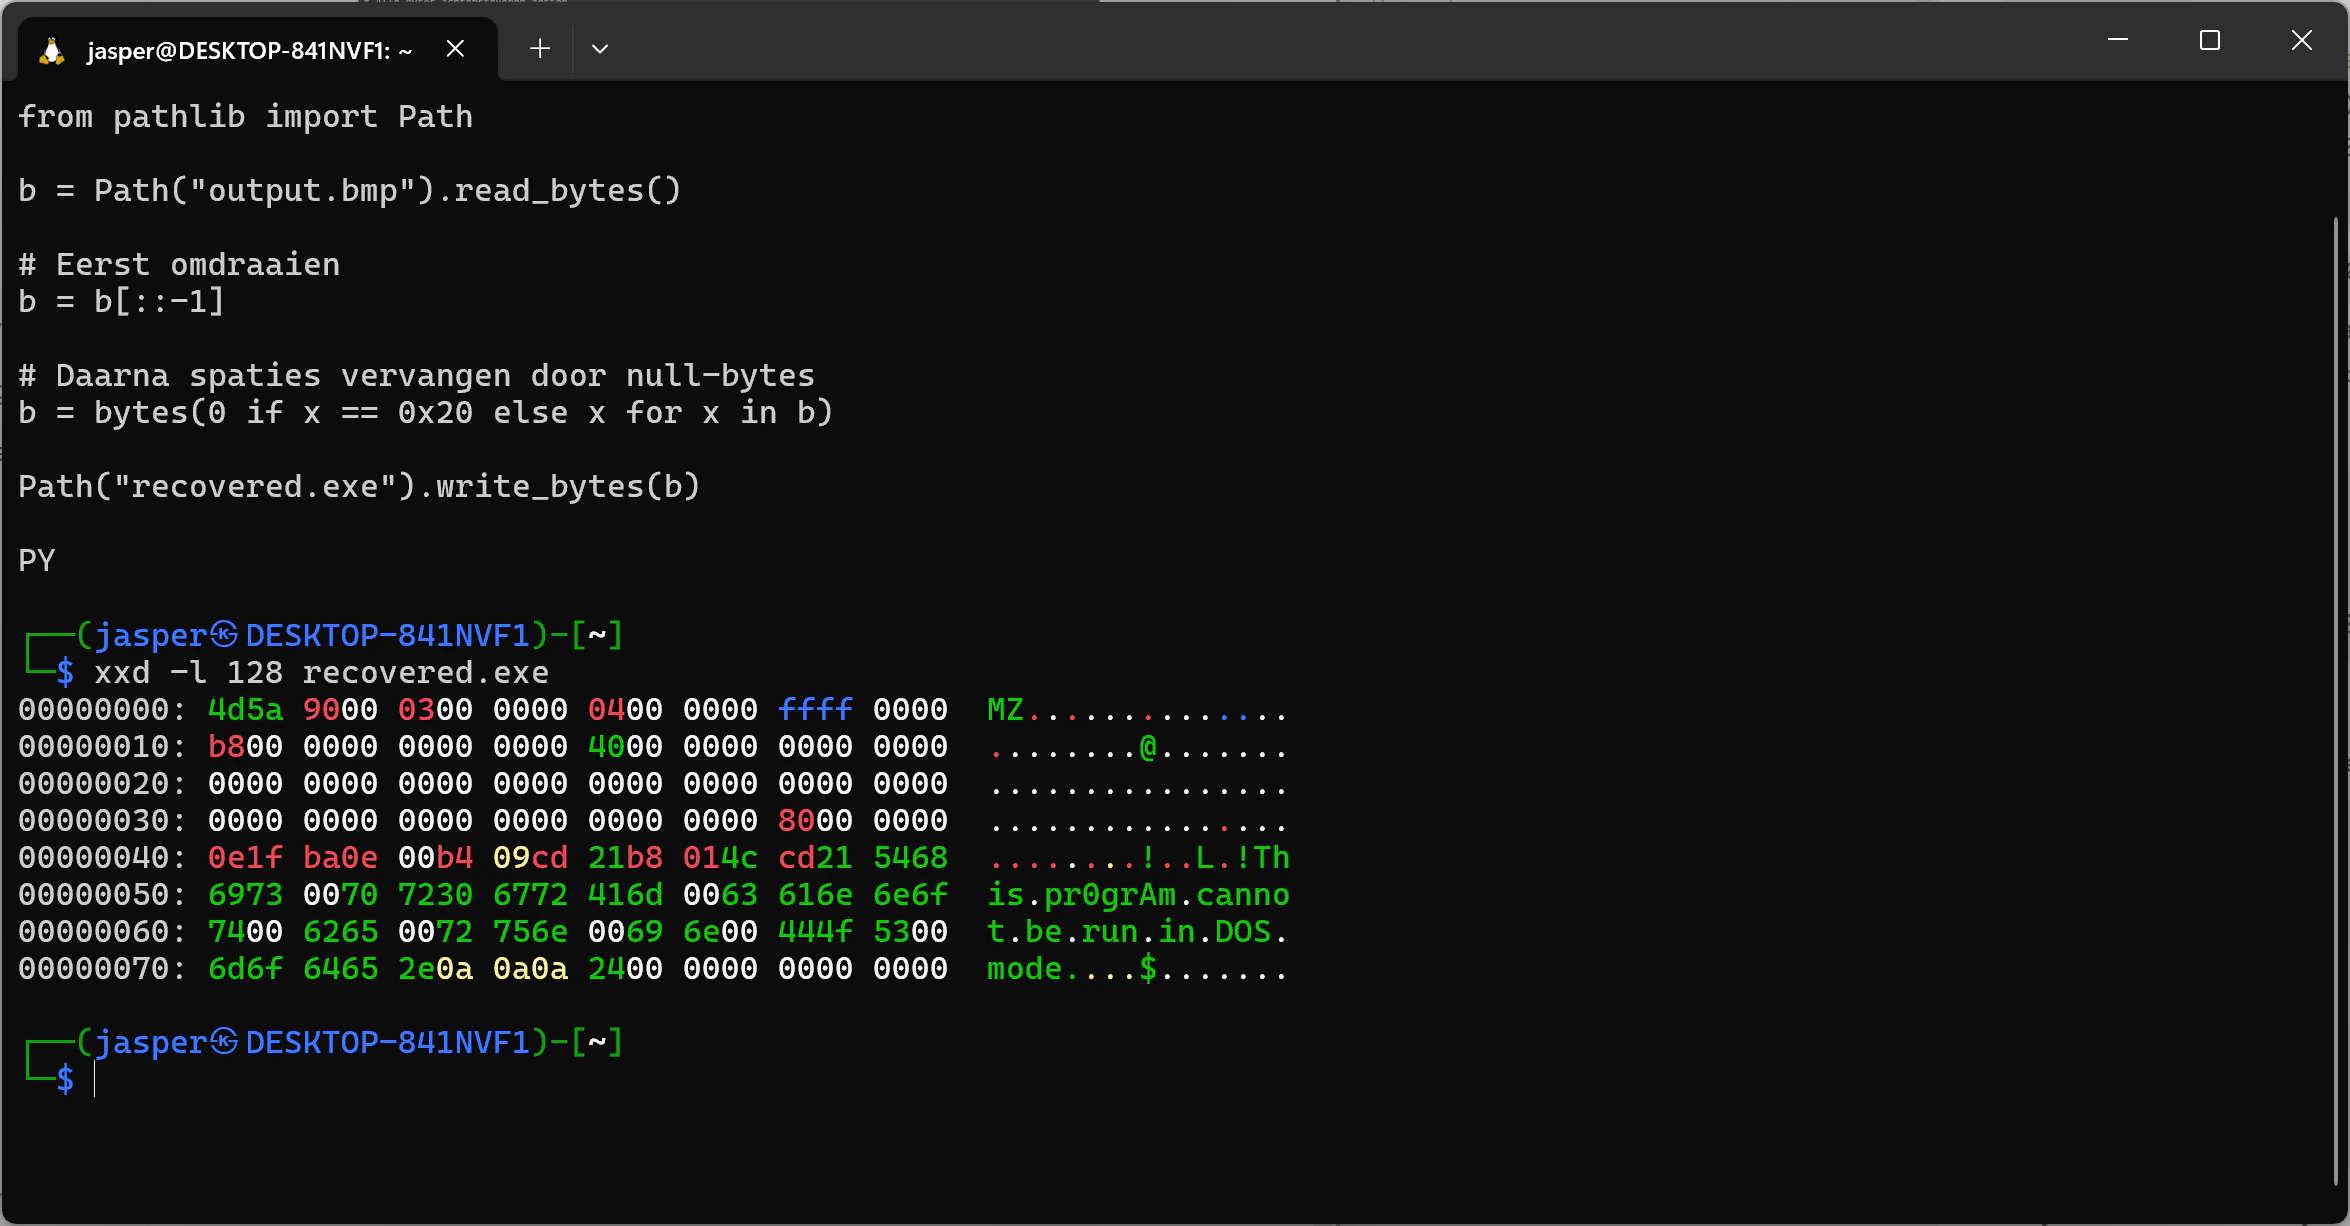
recovered.exe. Running xxd -l 128 recovered.exe confirmed that the 20s were successfully replaced with 00s. The file structure looked much healthier and more logical.
Analyzing the Executable & Extracting the Payload
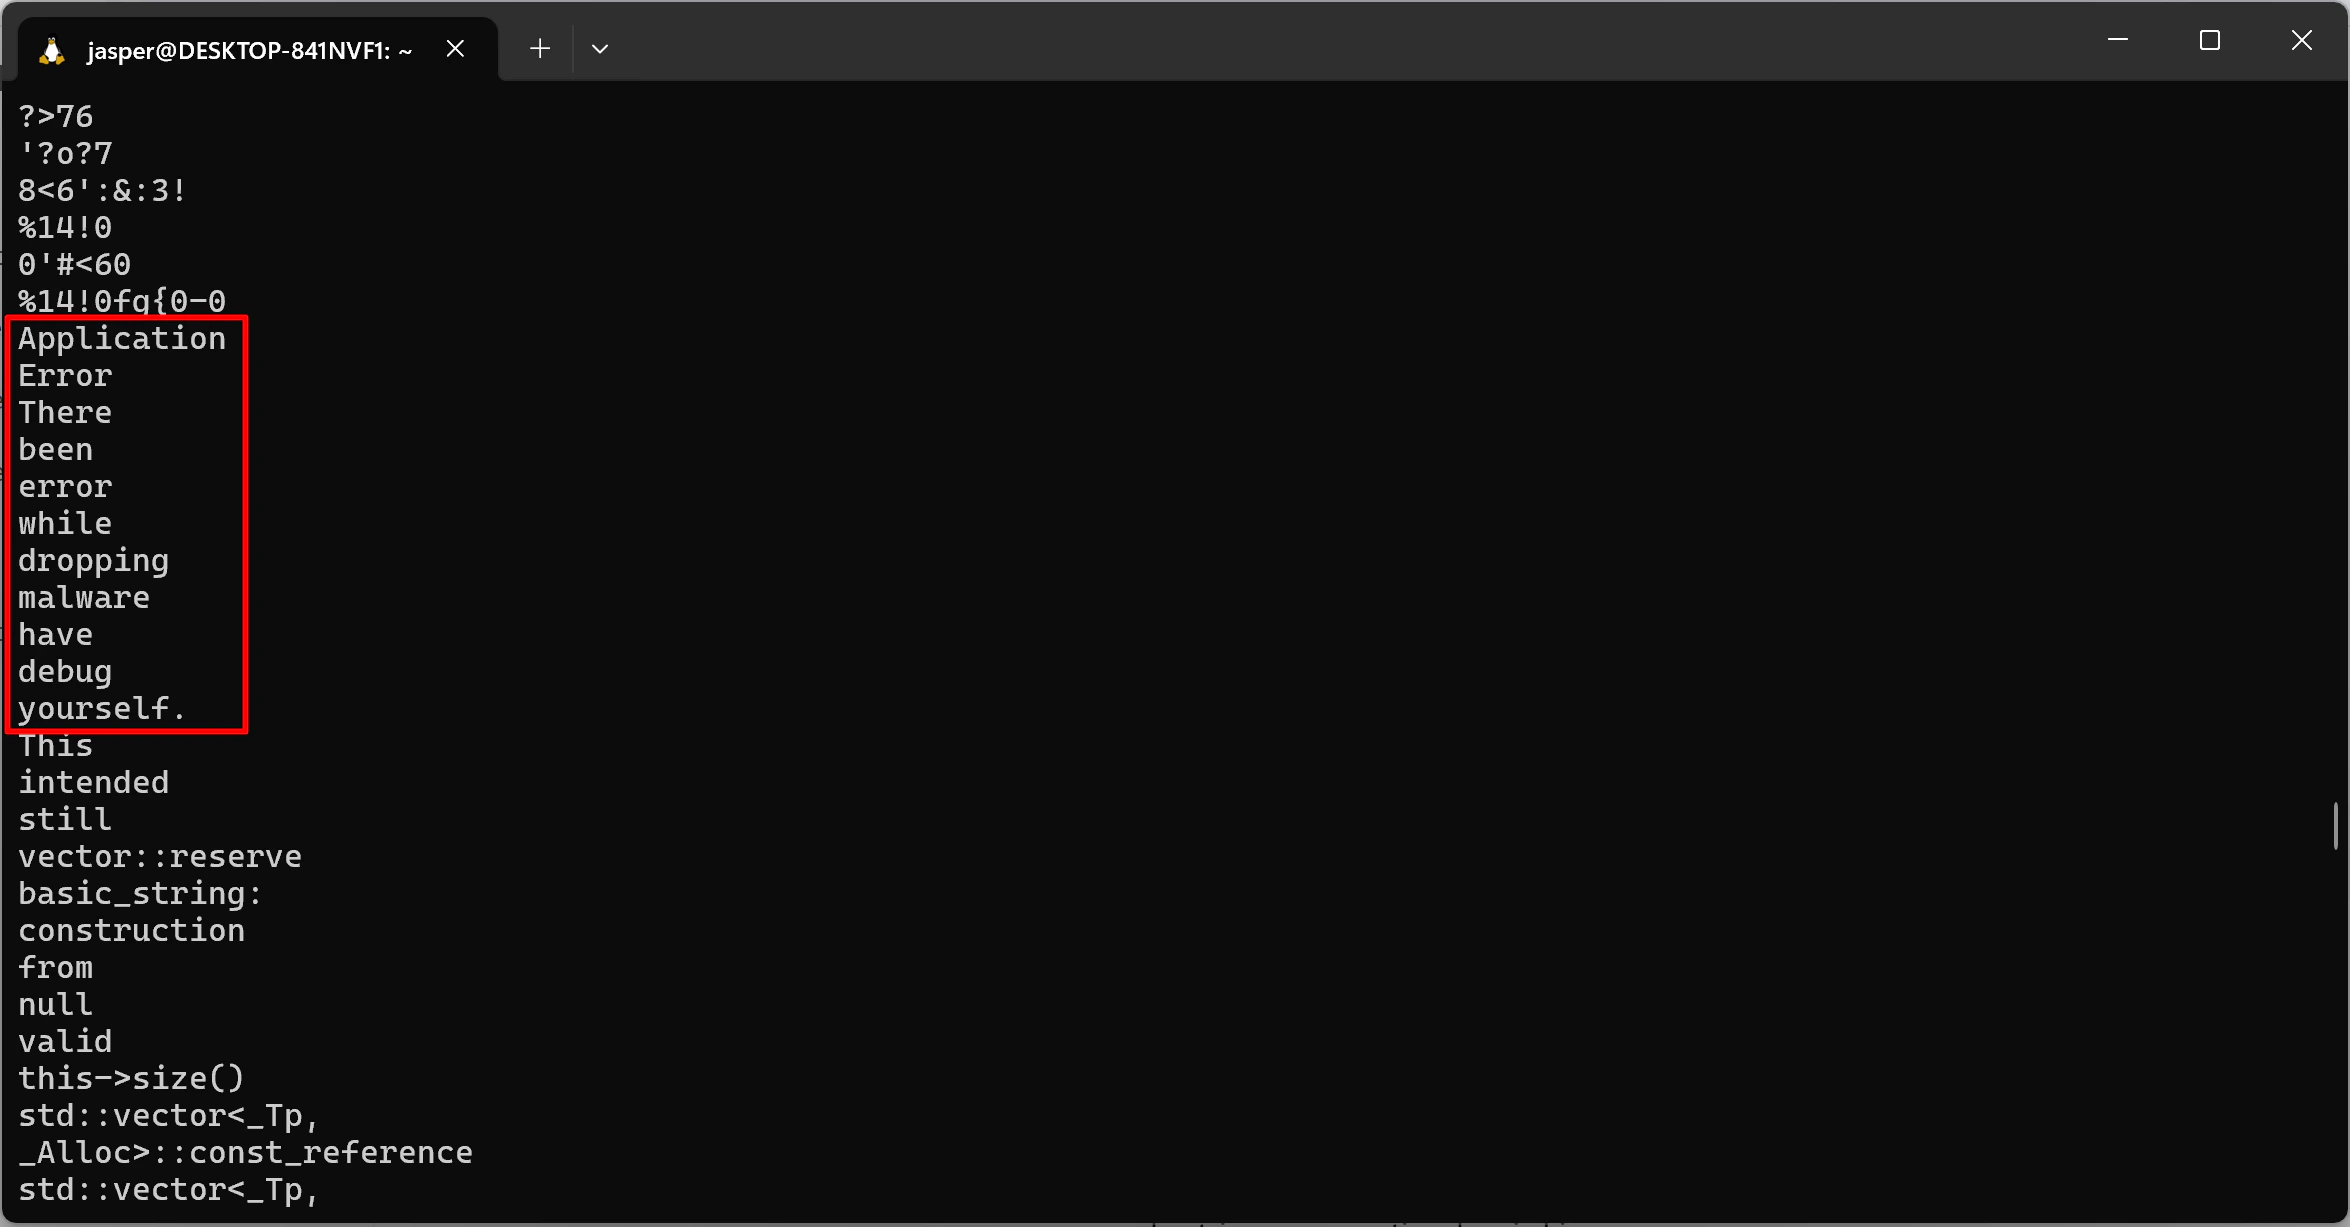
My next step was to runstrings on the newly recovered executable, hoping to find malware artifacts or perhaps the flag itself:
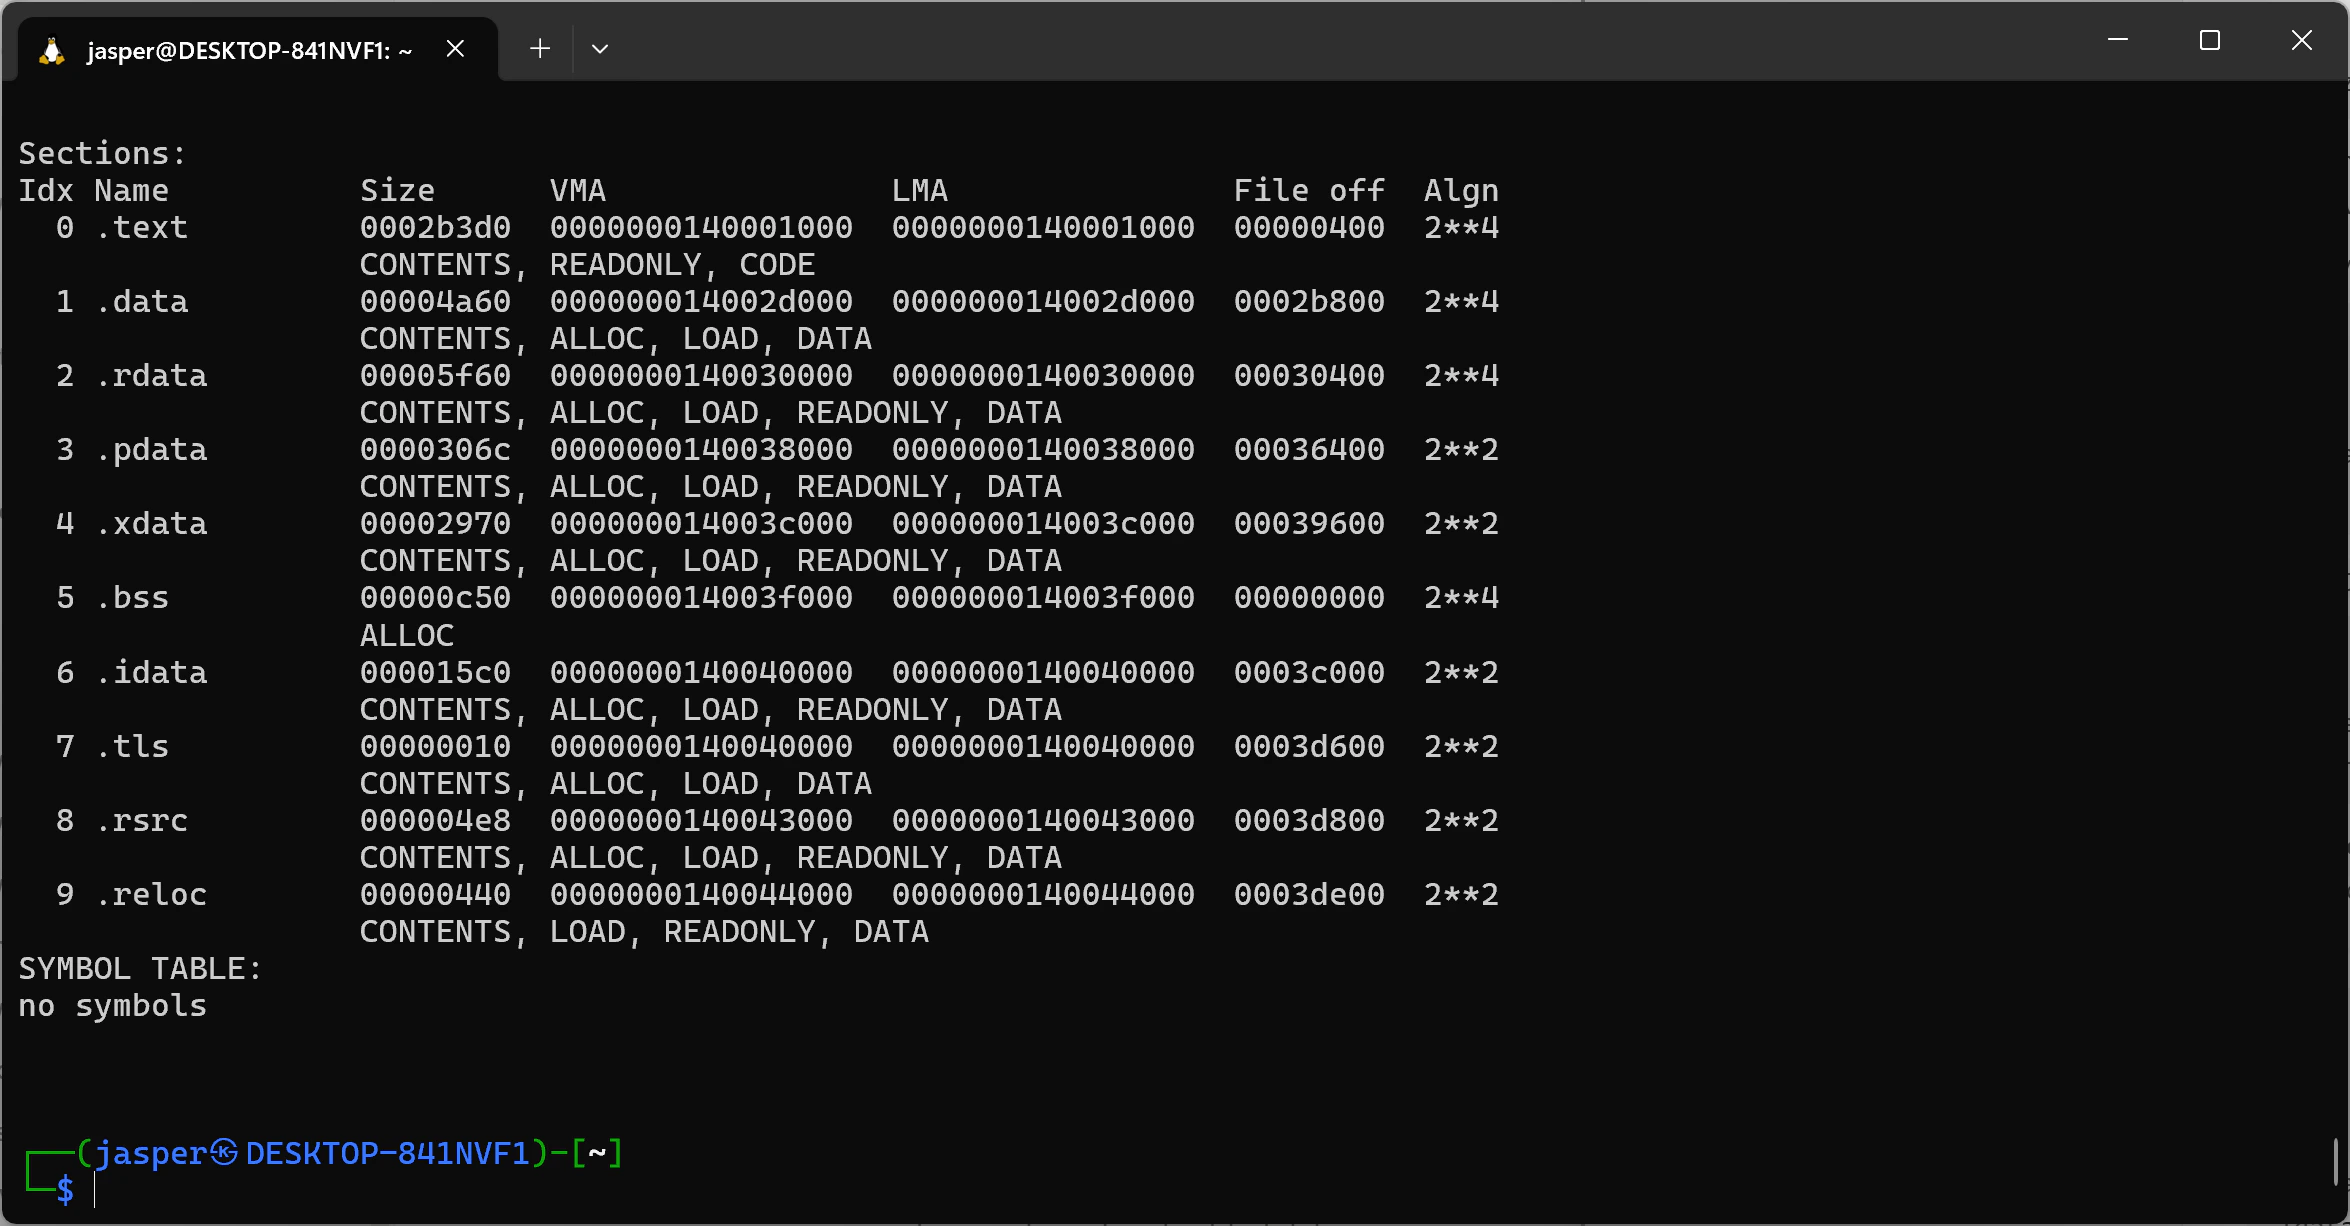
.text (code), .data (variables/data), and .rdata (read-only data) begin and end. The .data section is particularly interesting in malware analysis because droppers frequently hide their embedded payloads there.
Looking at the output, I noted two key offsets:
.datastarted at0x2b800.rdatastarted at0x30400
.rdata comes immediately after .data, I could calculate the exact size of the .data section by subtracting the starting offsets (0x30400 - 0x2b800). Using Python, this gave me a size of 0x4c00.
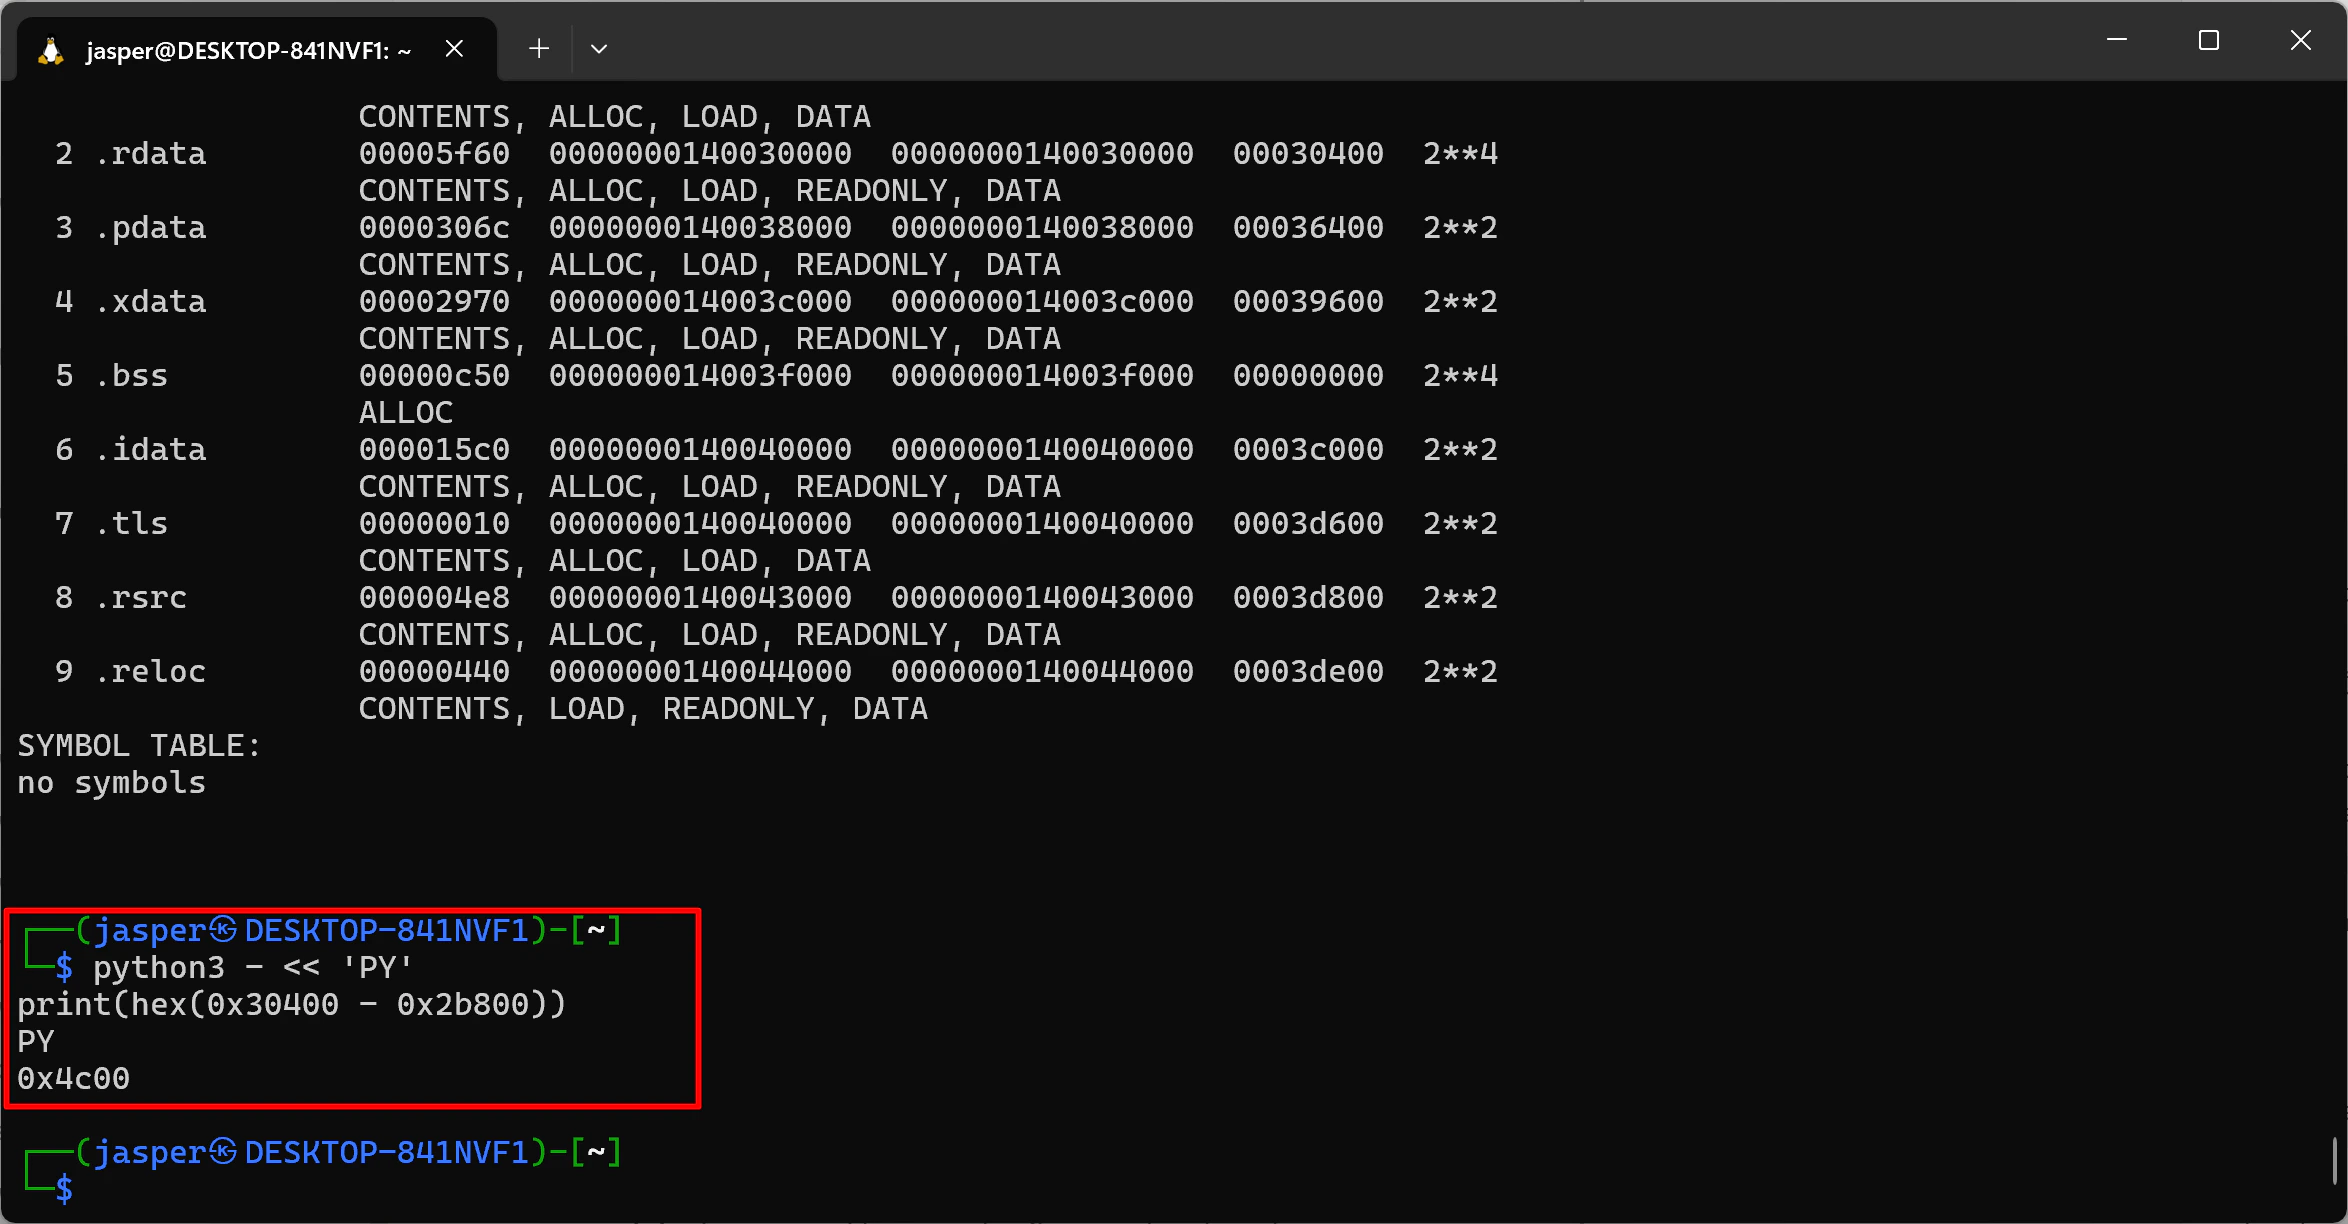
.data section:
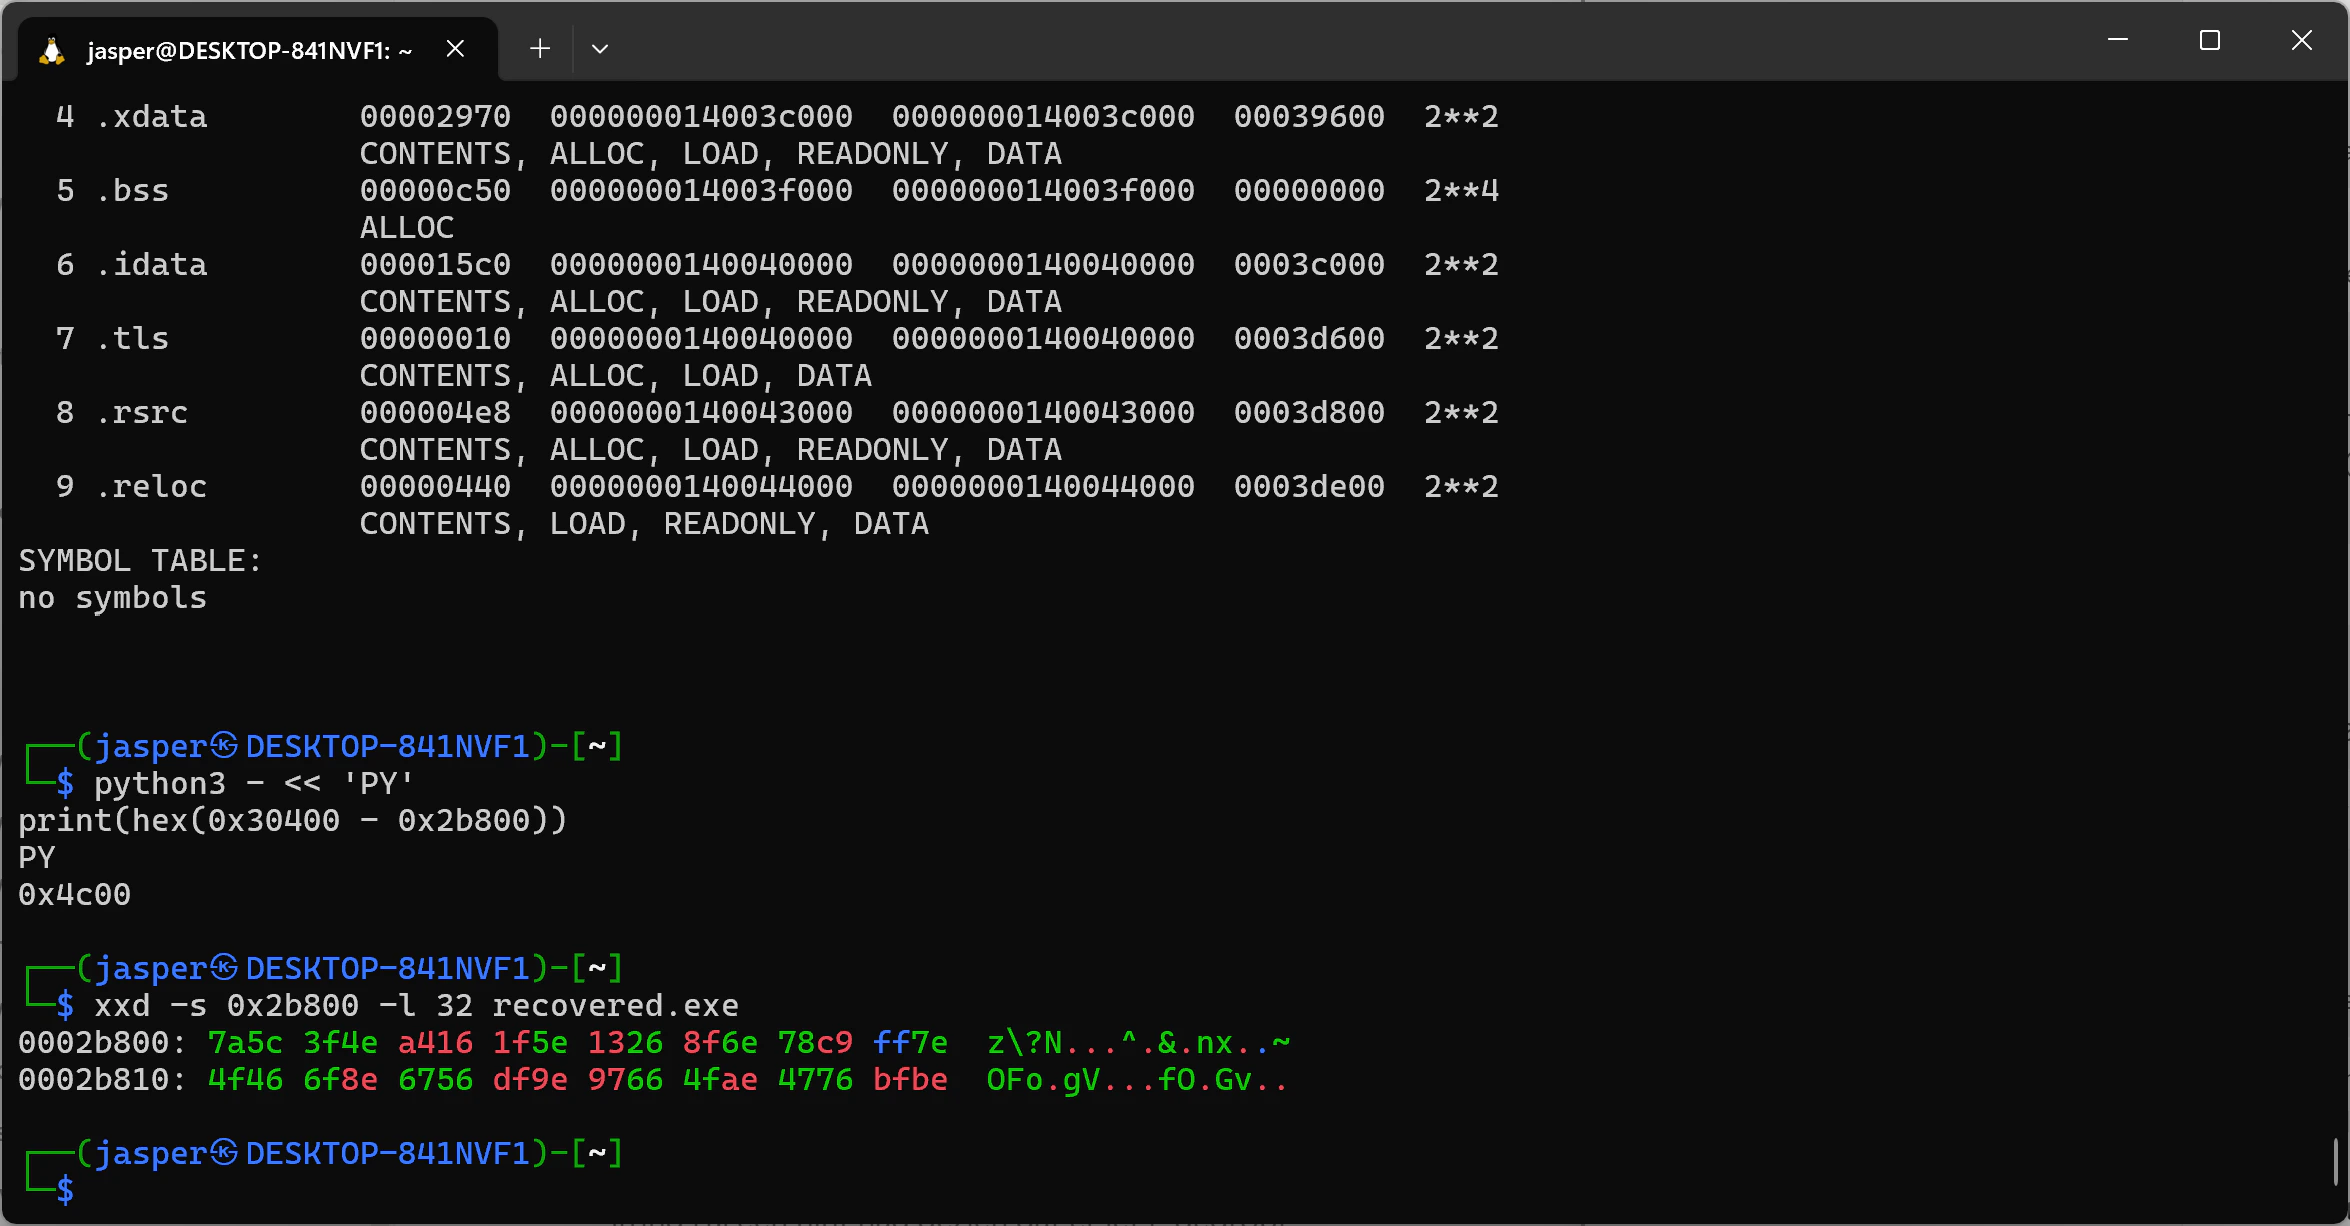
7a 5c. Since I suspected this data contained a dropped Windows executable, I expected it to start with the MZ header (4d 5a). Because it didn’t, I knew the payload was encoded.
XOR Decryption
If the first byte is7a and I need it to be 4d, I can use a logical XOR operation to find the key: 0x7a XOR 0x37 = 0x4d
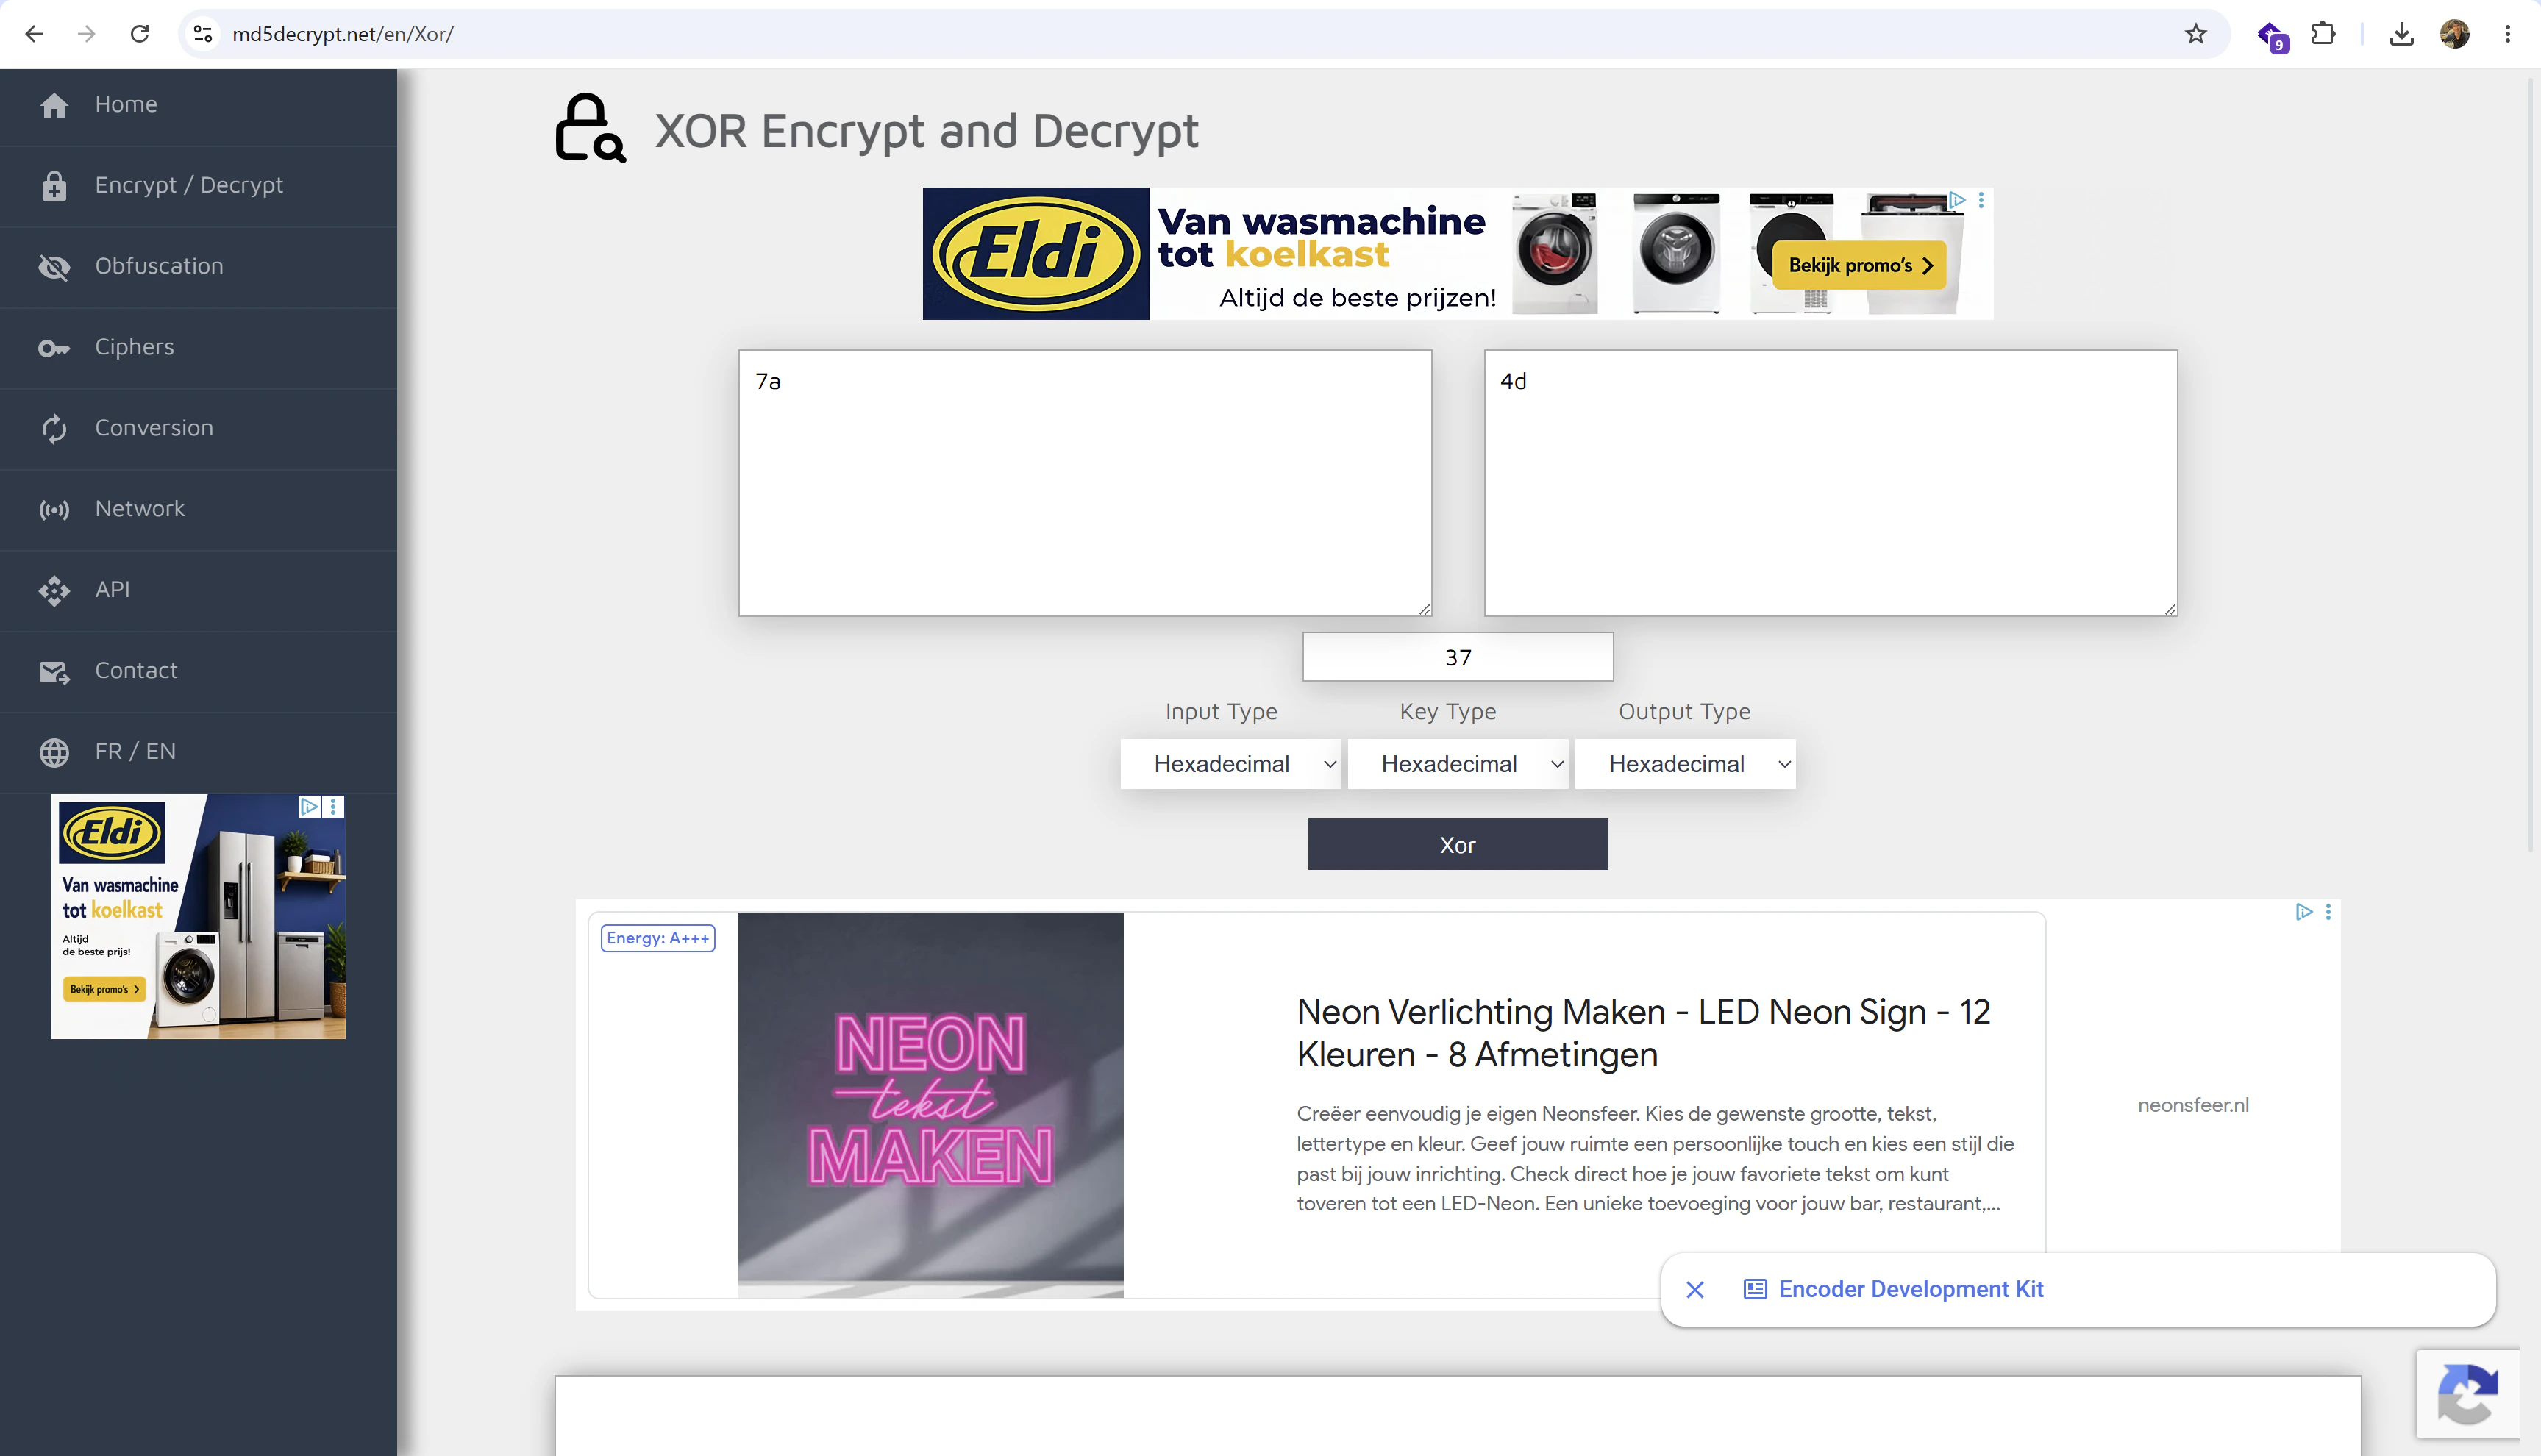
0x37. Through the challenge context and some reverse engineering logic, I determined the payload was encrypted with a rolling XOR cipher, where the key updates after every byte using the formula: key = (key * 7 - 0x7b) & 0xff.
I wrote a final Python script to extract and decrypt the .data section:
reversed.bin instead of recovered.exe. In recovered.exe, I globally replaced all 0x20 bytes with 0x00. Doing that to the embedded encrypted payload would corrupt it. I needed the raw, unaltered bytes from the reversed file.
After running the script, I extracted the strings from the newly decrypted payload:
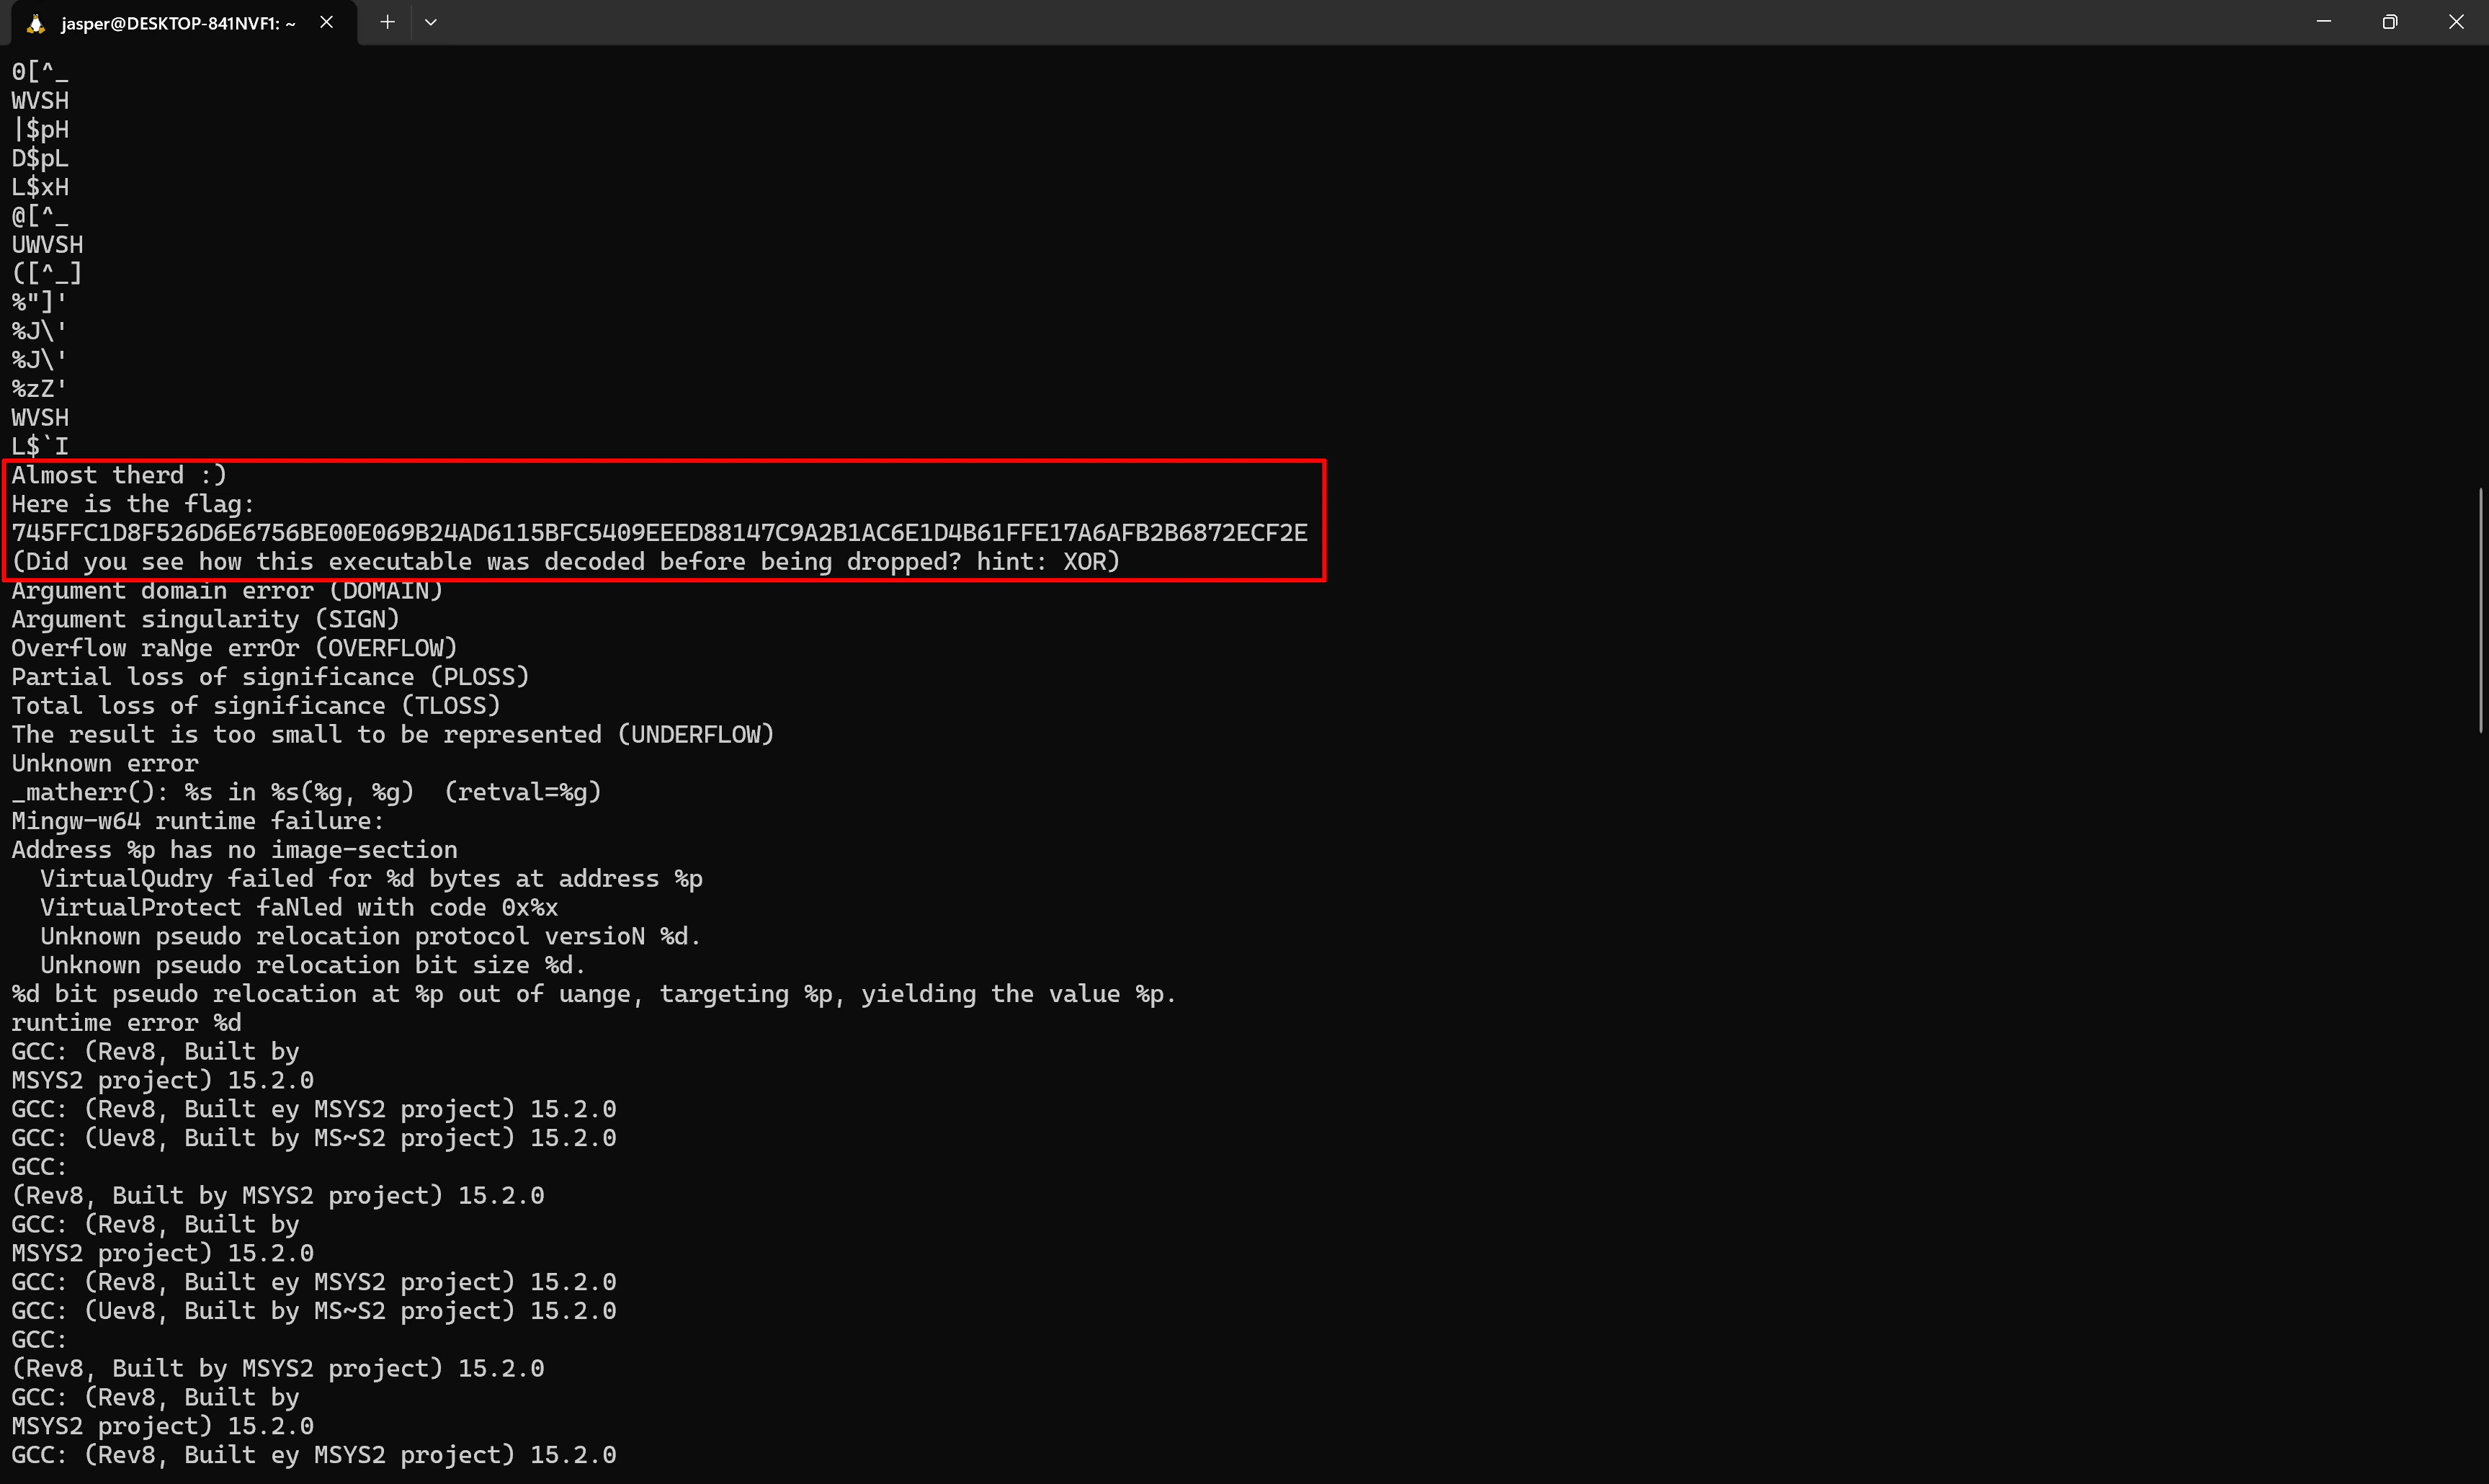
Almost therd :) Here is the flag:
Followed immediately by the flag itself!
Flag:745FFC1D8F526D6E6756BE00E069B24AD6115BFC5409EEED88147C9A2B1AC6E1D4B61FFE17A6AFB2B6872ECF2E
Tools Used
- file: To determine initial file types.
- xxd: To view hex dumps and identify magic bytes/offsets.
- strings: To extract readable text from binaries.
- Python 3: To script custom byte reversal, null-byte patching, and rolling XOR decryption.
- x86_64-w64-mingw32-objdump: To analyze the PE headers and map out the executable’s sections.
Summary
- Key Steps: I discovered that a disguised
.bmpfile was actually a fully reversed file with spaces replacing its null bytes. After writing Python scripts to reverse the bytes and patch the nulls, I recovered a Windows executable. By analyzing the executable’s headers withobjdump, I located an embedded payload in the.datasection, derived the starting XOR key (0x37), and wrote a decryption script to uncover the final binary containing the flag. - What I Learned: This challenge was a fantastic exercise in manual de-obfuscation. Calculating section sizes using header offsets and writing custom Python scripts to manipulate raw bytes on the fly are incredibly valuable reverse engineering skills.
- Crucial Mistakes/Takeaways: The most critical takeaway was realizing the danger of globally replacing bytes. If I had tried to decrypt the payload using
recovered.exe(where I replaced all spaces with null bytes), the decryption would have failed because the payload’s natural0x20bytes would have been destroyed. Using the untouchedreversed.binfor extraction was vital to solving the challenge.